Maple Alps

Recipes

Juicy Smoked Chickpea Burger (vegan with gluten free options)

RecipesAmanda Walter | Maple Alps22 Comments

It’s pretty much summer, and with summer comes my desire to be anywhere but the kitchen. It’s too hot to have the oven on and I would much rather be outside. However, even in summer, my husband appreciates warm meals (unlike me, who could just live off of smoothies, salads and popsicles all summer).

Since I prefer minimal time in the hot kitchen on hot days, I have been getting creative with summer meals. Burgers have always been a favourite, so it was only natural I figure out some ways to make a good patty. There were several versions I enjoyed, and I'll share the chickpea version with you today!

Juicy & Delicious Smokey Chickpea Burgers. #Vegan and #GlutenFree. So great and easy to make! A definite winner :D

When it comes to vegan burgers, I’ve had really good ones and really bad ones. One of the really good ones occurred when we went out to eat with some friends a few months ago. It was so delicious, and I don’t even know what it was made of. All I knew, was that it had this perfect smokey taste and just the right amount of BBQ sauce. It was on my mind for days, and I had to reinvent it.

Juicy Smoked Chickpea Burger (vegan with gluten free options)

On a side note, we've been clearing out our cupboards getting ready for a busy summer and a move, so I just went right there. I had a can of chickpeas, and I decided that was what my burger was going to be made of. 

By the way, I do enjoy making my beans from scratch now though!

Related: How to Cook Garbanzo Beans 3 Ways (Chickpeas)

Juicy Smoked Chickpea Burger (vegan with gluten free options)

It took several tries. I learned very quickly that I had to make sure it wouldn't crumble, and since we don't use eggs, it was a bit of a challenge with attempts I'd made in the past. I figured beans would help a lot with that, and was I ever right! With the oats and veggies in there, the texture was great - and the BBQ sauce....oh, the BBQ sauce...

Topped with some fried onion, a slice of vegan "cheese," and some fresh veggies, it's seriously delicious. 

The best part about these, are that they're light, and don't leave us feeling groggy and gross.

Juicy Smoked Chickpea Burger (vegan with gluten free options)

Juicy Smoked Chickpea Burger

what you need:

  • 15 oz. can chickpeas (or 1 1/2 cups if using cooked), drained and rinsed

  • Half Cup Rolled Oats

  • 3 TBSP BBQ Sauce

  • ½ Onion, Finely Diced

  • 1 Small Zucchini, Grated and dried well

  • ½ Small Carrot, Grated

  • About 1 tsp each: Salt, Cumin, Smoked Paprika

  • 3 Cloves Garlic, Minced

  • 2 tsp Olive Oil

what to do:

1) If using canned beans, drain and rinse well. Mash coarsely in a bowl with a fork. 

2) Add the rest of your ingredients and seasonings and mix very well. Your mixture should not be too wet, but wet enough to form. 

3) Shape the patties in your hand and lightly brown in heated fry pan. 

4) Serve as a plain patty, or put in a bun (gluten-free if needed) and top with your favourite burger toppings (we love vegan cheese, lettuce, tomato, and fried onions). Enjoy!

Note: These freeze and reheat well. 


What is your favourite thing to eat in the summer?

Let me know if you try out this burger by using the hashtag #MapleAlps! I love seeing what everyone comes up with! 


Pin this recipe:
Juicy & Delicious Smokey Chickpea Burgers. #Vegan and #GlutenFree. So great and easy to make! A definite winner :D
 

Vegan Pad Thai

RecipesAmanda Walter | Maple Alps19 Comments

A few days ago, the Mister and I were discussing what ethnic foods were our favourite. We talk about food a lot. Since we don’t eat out a lot, we’ve (or should I say I) have been experimenting with all sorts of recipes in an attempt to recreate some of our favourite ethnic dishes. Sometimes it works, and sometimes it doesn’t. 

We have quite the list of favourites that range over countries, but Thai was one of the ones on top. I've experimented with curries and rices and sauces and rolls, but today I'll share the noodles!

I know you're dying to get to the recipe but do please read the next paragraph for an explanation.

Update: in case you're confused about the Pinterest images not matching, it's because I've updated the images! It's still the same delicious Pad Thai though!

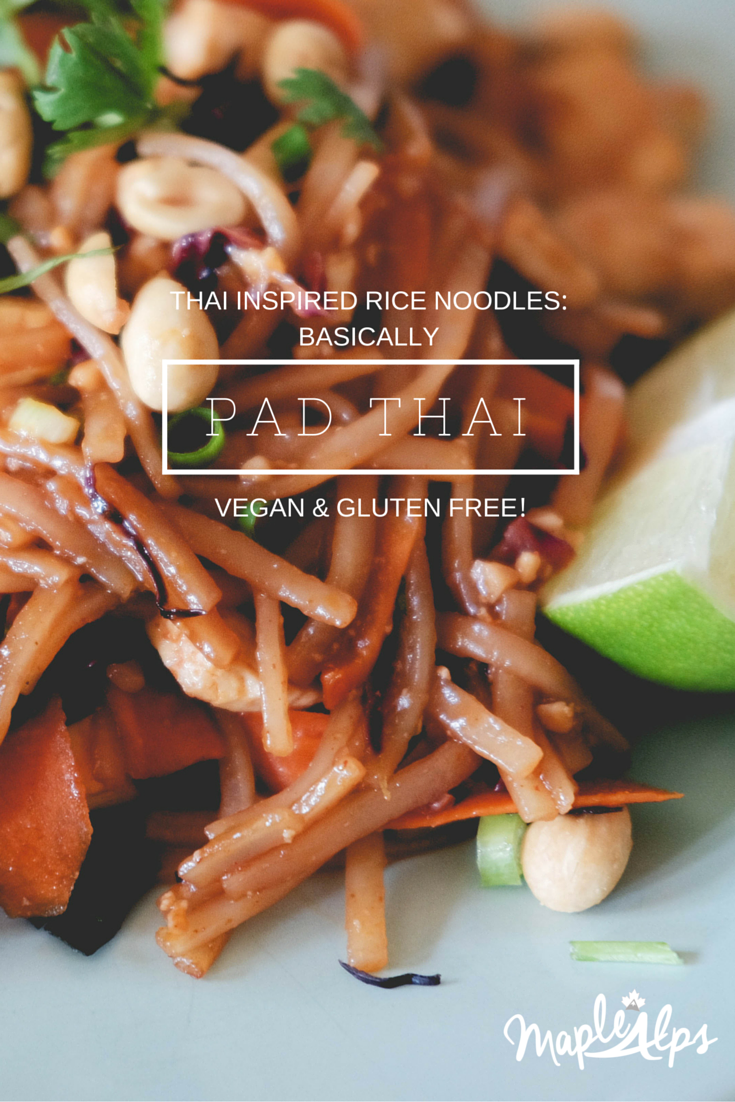
The easiest rice noodles ever! Tastes like pad thai, but without the fish sauce! Delicious! | www.maplealps.com

I called this recipe 'Thai-inspired,' because there is nothing truly authentic in it - no tamarind, no fish sauce... I pretty much took what was in my kitchen and mixed it all together. It's 'basically pad thai,' because it tastes pretty much like (do I dare say better than?) pad thai we've had out. 

It took several tries before I could confidently say I hit the nail on the head. And I think I finally have. I'll have to go to Thailand before I can decide for certain though!

Delicious Thai Inspired Noodles with Tofu | www.maplealps.com

It's pretty much as good as going out - not to mention making it saves us money. 

Tofu roasted in the oven makes this extra delicious. I like to over-cook it just a tad so it’s a bit chewy. Don’t ask. It’s a texture thing.

The vegetables add a pretty rainbow of flavour and colour to the rice noodles. Delicious. The only tragedy for this particular plate was that I was out of cilantro. Still tasted fantastic without it, but it would have been even better with it! Topping it with chopped peanuts was necessary - unless you're allergic to nuts, don't skip it!

Also, I never claimed to be a food photographer, or recipe writer so please bear (bare? bair?) with me. ;-)

Thai Inspired Noodles with Tofu | www.maplealps.com

8oz Flat Brown Rice Noodles
1 Carrot, Sliced thinly (I used the vegetable peeler to make strips)
Red Cabbage, sliced thinly
Half of each: Red and Orange pepper, Sliced thinly
14 oz Extra Firm Tofu, diced
Green Onion, chopped
Dash of Salt, Olive Oil, & Paprika
Optional Toppings: Fresh Cilantro, Fresh Lime and Peanuts

Juice of One Lime
4 TBSP Soy Sauce or Braggs (I use a combination sometimes)
3 ½ TBSP Brown Sugar
1 Clove Garlic, minced
Optional: Splash of Siracha Sauce

1) Dice tofu and add a dash of salt, olive oil and paprika. Evenly space it on a baking tray that is lined with parchment. Insert in oven preheated to 425 degrees F. Roast for 15 minutes, turn, and roast for another 15 minutes
2) Meanwhile, boil some water to soak the noodles in. Once boiled, remove pot from stove and put the noodles in to soak for at least ten minutes.
3) Prepare your sauce in a small bowl - add all ingredients and mix well. Set aside.
4) Add green onion whites and sliced vegetables to your pan with a touch of coconut oil. Cook a few minutes until soft. 
5) Add the rice noodles to the pan with the vegetables. Stir in the prepared sauce and allow to simmer.
6) By now, the tofu should be done. Add to the pan and toss gently, but well.
7) If you like, you can add some peanuts for extra yumminess! 
8) Serve right away - top with fresh cilantro, green onion, chopped peanuts, and fresh lime.

Best fresh.


Delicious and Easy Thai Inspired Rice Noodles | www.maplealps.com


Stay tuned for more favourites coming up but until then: What is your favourite ethnic food?


PS: The Creamiest and Dreamiest Vegan Mac n Cheese Here!


Strawberry Cream Vegan Cheesecake

RecipesAmanda Walter | Maple Alps21 Comments

Once in a while, we have a great weekend. This last weekend was one of them. Besides having some much needed social contact with some amazing people (can someone say Monopoly Deal?!), we went to a phenomenal Michael Card concert, and ate some delicious food! Our apartment also has twice the amount of fresh flowers in it as usual right now, so that makes me extra happy.

Speaking of food my husband has been bugging me for quite some time to make a vegan cheesecake, so I finally used this occasion to happily oblige. 

Strawberry Cream Vegan Cheesecake | www.maplealps.com

In the past, I've made vegan cheesecakes with a tofu base, but after realizing how much I love cashews (sorry, those with nut allergies!), I decided to try one with a cashew base.

Adding coconut cream added to the consistency and taste of it and made it so very rich and enjoyable. Seriously, as much as I love real cheesecake, it doesn't compare to this. 

Strawberry Cream Vegan Cheesecake

The one downside of making this was the expense! Cashews and agave, even at discounted prices, are no joke when it comes to pulling out the wallet. It was definitely worth the push on our budget though. We'll just eat the leftovers for breakfast, lunch and dinner today to make up for it. That's how it works, right?

Strawberry Cream Vegan Cheesecake

A special shout out to my awesome hand model who cut the cake! Isn't she great, folks?

I think when Summer rolls around, I'll try this again with some fresh picked berries - maybe blueberries or blackberries! Actually, I may just have to enjoy them on the side, since my husband prefers a plain cheesecake...

Strawberry Cream Vegan Cheesecake

Strawberry Cream Vegan Cheesecake

Adapted from Minimalist Baker and Sift and Whisk

What You Need:

Crust:

  • 1 cup Medjool Dates, pitted (soak if not moist)

  • 1 cup walnuts

Filling:

  • 3 cups cashews (soaked overnight, or in boiled water for an hour and drained)

  • Juice of 2 lemons

  • 1 3/4 cups coconut cream

  • 1 tsp vanilla extract

  • 1/3 cup coconut oil, melted

  • 1 cup agave (or honey, if not vegan)

Topping (Optional):

  • 2 cups berries of choice (I used strawberries)

  • 1 TBSP agave (or honey, if not vegan)

What to Do:


1) If you soaked your dates, pat them dry to remove excess water (to prevent crust from becoming to soggy). Put dates into food processor and pulse until a paste forms. Remove from bowl and put walnuts in. Pulse to chop.

2) Re-add the dates to the food processor bowl and pulse until the nuts and dates are mixed well, forming a ball.

3) Press evenly into a 9-inch springform and then place in the freezer while you prepare the filling. 

4) In a blender, combine all of the filling ingredients. Blend until smooth, and no nut chunks remain. 

5) Pour into springform and place in freezer as you prepare fruit topping.

6) After cleaning out food processor bowl, add berries (remove tops if necessary) and agave. Process until smooth. 

7) Carefully pour over filling (I used a large ladle to do this), and spread evenly across the top. 

8) Place back in freezer for at least 4 hours. Before serving, thaw ten minutes, or keep it frozen (just warm up your knife in hot water) - up to you! Enjoy!


I love how this provided some much needed Summer vibes on a great, sunny day!

Think you'll try it? 


Strawberry Cream Vegan Cheesecake
Strawberry Cashew Cream Vegan Cheesecake. Delicious and easy to make! Love the cashew texture!

Dark Chocolate Coconut Muffins (vegan + gluten free)

RecipesAmanda Walter | Maple Alps22 Comments

It's been a chocolate kind of week for me - which, now that I think about it, is slightly ironic, considering my last published post. Then again, you at least now that I brush my teeth

Anyway, because I've had chocolate on the brain (I blame the grey weather), I decided to share with you a recipe I was playing around with this week.

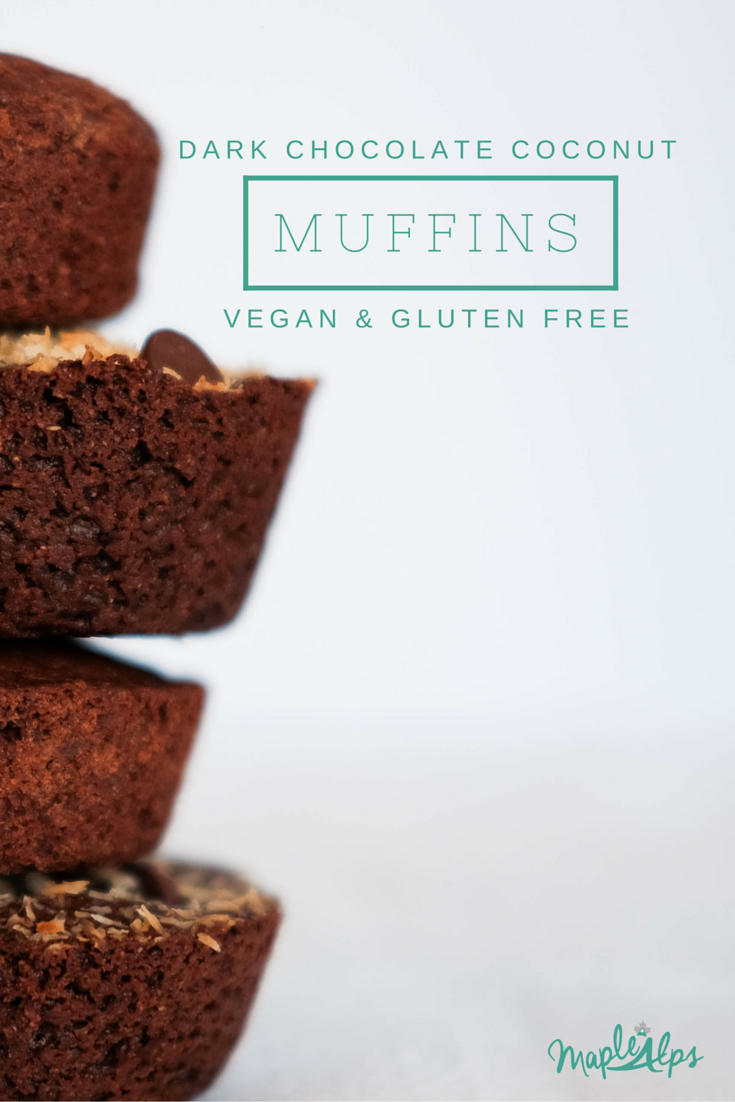
Dark Chocolate Coconut Muffins (vegan & gluten free)

To be completely honest, I spent a better number of my years skeptical about foods labeled "vegan" or "gluten free." Whenever I saw one of those words, I replaced it right away with "unfit for food." Embarrassing, I know, but you have to understand that I had some awful experiences leading to this association. It wasn't until the last few years I started to realize that plant-based foods could, in fact, be delicious! 

What does this have to do with chocolate? Nothing. I'll get back to the point now...

Dark Chocolate Coconut Muffins (vegan & gluten free)

This weekend, we have some friends over - one of whom is gluten free - so I spent all week trying to figure out what I could do to make sure she could eat. This was by no means a chore (I know you're reading this!), because I love experimenting! The one thing that I purposed in my head to make was some sort of muffin (probably because I was craving banana chocolate chip muffins that day.). I set to work trying to make something edible.

Dark Chocolate Coconut Muffins (vegan & gluten free)

My first attempt was a disaster. I tried an oat flour. I kind of guessed by the batter that it was going to be fail. The silly things didn't rise much. They at least tasted okay-ish. I didn't really think so, but my husband has been nibbling on them for days. My second attempt....also not so great. Actually, they turned out worse than the first ones. I used coconut flour this time with the brilliant idea that I would make coconut wonderfulness. Nope. They turned out even worse than the first ones! I wasn't terribly discouraged since I had no clue what I was doing (though that coconut flour was $$$...).  I finally decided to buy an all-purpose gluten free blend (bonus: it was on sale!). 

Dark Chocolate Coconut Muffins (vegan & gluten free)

The result was a delicious [chocolaty] muffin. Well, 12 of them. They didn't rise as much, but they were yummy. I still have plenty of intentions to keep experimenting, but for the love of my time, I just had to make something work. And this worked. Oh boy did it work! It worked so well that I downed like four as soon as they were cooled. Okay fine, I didn't wait till they cooled...you might not either! 

The one downside was that they were a little dry the next day - which a few minutes in the oven remedied quickly.  

Dark Dark Chocolate Coconut Muffins (vegan & gluten free)

Dark Chocolate Coconut Muffins (Vegan & Gluten Free)

Makes 12 muffins
Adapted from Baking Ginger

1/2 cup coconut oil
3/4 cup gluten-free flour
1/2 cup organic cane sugar
2 TB ground flax seed
5 TB water
1/2 cup cocoa
1 tsp vanilla extract
1 tsp almond extract
1 1/2 tsp baking soda
1/4 cup unsweetened almond milk
dark chocolate chips (to top)
(optional) organic shredded coconut (to top)

1) Preheat oven to 350 degrees F (180 degrees C) and lightly grease muffin tin.
2) Mix ground flax seed and water in mixing bowl. Let stand for five minutes
3) Add coconut oil and sugar. Mix well
4) Add the rest of the ingredients (except for the chocolate chips and coconut) and mix well.
5) Pour batter into muffin tin and top generously with chocolate chips or coconut...or both!
6) Bake for 20 minutes, or until muffins pass the toothpick test (toothpick comes out clean)


Dark Chocolate Coconut Muffins (Vegan & Gluten Free!) Super easy and really delicious - especially warm!
 

So there you have it. These babies are quick to whip up, delicious, and no one will even know they're vegan AND gluten free. What could be better? By the way, does anyone have any coconut flour tips?

PS: It may be a while before I write about chocolate again. But don't worry, it will be back. 


Black Bean Brownies (vegan + gluten-free)

RecipesAmanda Walter | Maple Alps22 Comments

I realized the other day that I haven't really baked anything in a while. The husband and I aren't huge baking (cake, etc.) eaters, so unless it's for someone else, I don't bake anything but bread. The one thing we do make an exception for once in a while are brownies. 

Brownies are so great. I just love them when they're warm and gooey, but still chewy. We fight over the corner pieces all of the time. 

As I was browsing Pinterest yesterday, I came across a recipe for black bean brownies from Minimalist Baker. I had seen this recipe plenty of times, and those brownies always looked so delicious, so I decided that it was the day I would make them. I had all of the ingredients on hand anyway! 

I was so excited about this, I wanted to share and give my own review of this recipe. 

Vegan Gluten Free Black Bean Brownies: A Pinterest Review

The best part about this recipe was that I only needed a food processor and a baking pan. Easiest clean-up plan ever! I was a bit concerned after blending everything because the batter was a bit runnier than how I felt it was described in the original recipe. They baked seemingly great despite that! 

Black Bean Brownies

I added sliced almonds to the brownies because for some reason, the whole chocolate/almond combination was really calling out to me. Maybe next time I'll go with walnuts. I learned today that they're a great source of omega-3! I like mixing things up anyway.

Black Bean Brownies

Note to me for next time: They need quite some time in the pan to cool before putting them on the rack. I lost two because of my excitement in getting them out and cooled. Well, they "lost" their form, is all. I gobbled them up, gooey mess and all.

Black Bean Brownies

Honestly, I went for these because they were vegan and gluten-free, but I feel like they aren't the healthiest because there is quite a bit of organic cane sugar in them. They are pretty packed with fiber though.

In either case, they needed to pass the husband test, and I think they did! They have just the right amount of chewy outside and gooey inside. Nothing quite matches a real brownie, but this comes in pretty high on the list. By the way, they definitely taste better the second day - I would know, since I had one for breakfast.... :)

Black Bean Brownies

Makes 12 - Serves 1 Chocolate Craving Female
From Minimalist Baker

1 3/4 (1 15oz can) cups black beans, well rinsed and drained
2 heaping Tbsp Flaxseed Meal
6 (90g) Tbsp water
3 Tbsp (45 g) coconut oil, melted
3/4 cup (72 g) cocoa powder
1/4 tsp sea salt
1 tsp pure vanilla extract
1/2 cup (105 g) organic cane sugar, slightly ground (I ran it through my food processor)
1 1/2 tsp baking powder

Optional fun toppings: crushed walnuts/pecans, sliced almonds or semisweet chocolate chips

1) Preheat oven to 350 degrees F (176 C).
2) Lightly grease a 12-cavity standard size muffin tin. 
3) Combine the flaxseed meal and water in the bowl of the food processor. 
4) Pulse a few times and then let stand for a few minutes.
5) Add all other ingredients (besides toppings) and puree for  about 3 minutes. Scrape down the sides as required
6) If the batter is too thick, add a Tbsp or so of water and pulse again. It should be quite thick, but not runny.
7) Evenly distribute the batter into the muffin tin.
8) Optional: Sprinkle with toppings of your choice
9) Bake for about 25 minutes, or until the tops are dry and the edges start to pull away from the sides.
10) Remove from the oven and allow to cool for 30 minutes before removing GENTLY from pan (I used a spoon to help with that). The insides are meant to be gooey, so don't be too alarmed if they are quite moist. Besides, they're vegan, so it's okay :) 

Store in an airtight container for up to a few days. 


I would definitely recommend this recipe to anyone who is adventurous enough to try it out! As a matter of fact, I think I'll try these on a vegan, gluten-free (ultimate guide to gluten-free eating anyone?) friend next week!

What about you? Will you try making these A+ brownies this weekend?